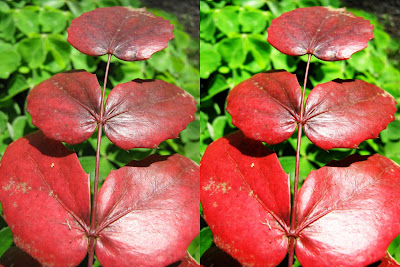
Here's the SOOC image, no editing what so ever.
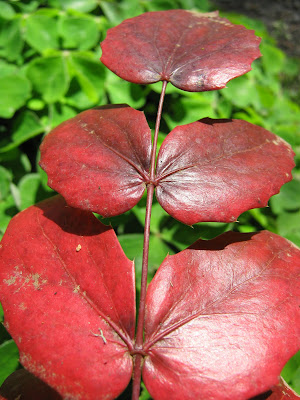
Ok, first you open the photo in Photoshop. Duh, right?
See the palate on the bottom right, where you have your layers? That would be your layers palate. Actually, I don't know if that's what it's technically called, but that's what I call it, so that's what we're going to call it. Ok? Good. See the only layer there that says "background"? Right click on that. A menu will pop up. Select 'Duplicate Layer'.
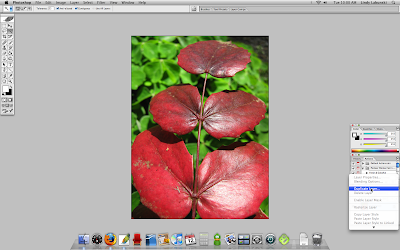
A little window will pop up that says 'background copy', just click ok. You now have two layers.
Now, in that same palate, see the little drop down menu on the top left that right now says 'Normal'? Click on that and select 'Screen'. This will lighten your photo a bit, don't panic and don't do anything to change that!
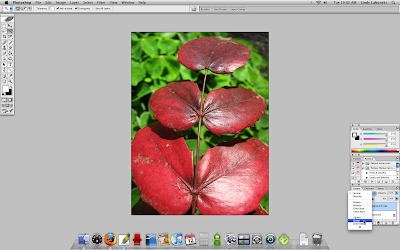
Now, go up to your layer menu on the top of your screen. In the menu that pops up, toward the bottom is Flatten Image. Click that. Now you'll notice that you're back to just having a 'background' layer in your layer palate on the bottom right.
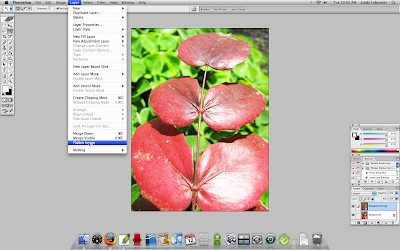
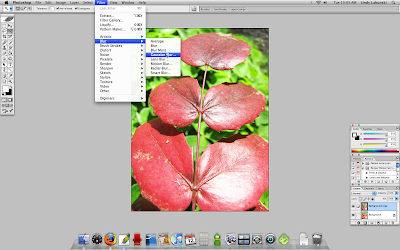
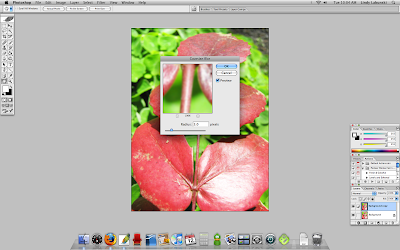
Right click on that layer again and create another duplicate layer. This time, you're going to go up to your Filter menu, click on Blur, and then select Gaussian Blur. A little screen will pop up. You'll want to change the radius to 3.0 pixels then click ok. This will slightly blur your photo...again, don't panic.
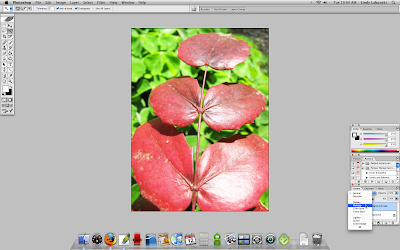
Now, go back down to your layers palate and click on the drop down menu that says normal again. This time, you're going to select Multiply.
And shazam! Suddenly you have a photo that is crisp and colorful in the foreground and has a wonderful blur to the background, amping up any of that yummy bokeh that you may have already had. Here's the SOOC and the finished product side by side so you can really see the change. I did no other editing besides what I put on here, cross my heart.
If you have any questions, just leave them in the comments and then check back there for answers!


ShaZAM! I'm going to have to try this! Thanks!
ReplyDeleteJust had to let you know that I tried it, and it worked beautifully! Thanks, Lindy!
ReplyDeleteYou could also try a softlight filter for a similar effect! Looks good!
ReplyDeleteLOVE IT!!!!!!! Thank you thank you thank you! And you did an awesome job on the tutorial too- i followed with one of my own photos right along with your lesson and I LOVE the outcome... hello, newest, fun, awesome tricky pooh! I love it! Thanks a billion!
ReplyDelete